Views: 0 Author: Site Editor Publish Time: 2026-11-13 Origin: Site
Are you tired of enduring a bumpy, unstable ride every time you step onto your lawn mower? A wobbly seat turns what should be a productive chore into a physically draining experience. When your equipment begins to show signs of wear, a technical schematic—often called a seat drawing—serves as the primary reference point for diagnosing and resolving mechanical failures.
This guide breaks down how to leverage these diagrams to troubleshoot issues, verify hardware integrity, and perform lasting repairs. Furthermore, we explore the industry shift toward standardized upgrades, helping you decide when a simple fix suffices and when it is time to invest in a modern seating solution.
A technical diagram is far more than a static image; it acts as the definitive blueprint for your mower’s operator interface. By analyzing an exploded view, you gain a clear understanding of how brackets, suspension springs, and mounting hardware integrate with the chassis.
The exploded view deconstructs the seat assembly into individual, manageable components. You can identify specific base plates, slide tracks, and fasteners by their unique reference numbers. This transparency allows you to source exact replacements rather than relying on generic hardware that may not meet the original safety standards. When you order parts based on these precise identifiers, you eliminate installation guesswork and ensure a factory-fit result.
Before modifying or replacing your setup, you must evaluate the bolt pattern dimensions listed in the schematic. These measurements determine whether a new unit will align with your existing chassis. If you are upgrading, comparing these dimensions against aftermarket specifications is a vital step to avoid unnecessary fabrication work. Accurate measurement ensures your new lawn mower seat attaches securely without compromising the structural integrity of the frame.
The operator presence sensor is a critical safety feature highlighted in almost every seat drawing. Never attempt to bypass this switch. If the wiring appears compromised in the diagram, follow the outlined routing to restore the connection properly. Protecting this electrical path ensures that blades deactivate immediately if you dismount unexpectedly, keeping you safe during operation.
Referencing your diagram transforms complex troubleshooting into a logical, step-by-step process. Whether you face excessive vibration or a sinking cushion, the schematic often points directly to the mechanical root cause.
If you feel the seat shift beneath you on uneven terrain, the issue is typically linked to worn bushings or loose slider tracks. By using the drawing to inspect these high-friction points, you can isolate where the slack originates. Replacing these specific, often overlooked components is usually sufficient to regain a stable, comfortable ride without the need for a full overhaul.
When foam cushioning detaches from the pan, check the schematic to determine the original mounting method. Some commercial-grade units utilize heavy-duty bolts, while others rely on industrial adhesives. If the diagram indicates mechanical fasteners, prioritize a bolt-on repair. In cases where the material was bonded, a high-strength, weather-resistant adhesive is required to ensure the cushion remains secure under the stress of daily landscaping.
A sagging seat often signals that the internal coil springs or shock absorbers have reached their fatigue limit. The diagram helps you isolate the suspension module from the chassis. If the springs appear stretched or heavily corroded compared to the specifications, swapping them out is essential for restoring proper ride height and lumbar support. Industry analysts note that as original equipment parts become harder to source, many operators are pivoting toward modern mower seat replacement options that feature improved vibration-dampening technology.
Sometimes, a detailed review of the schematic reveals that individual repairs are no longer practical. Understanding when to abandon a patch job in favor of a complete upgrade is a key aspect of long-term equipment maintenance.
If the drawing shows a simple bolt-on assembly, but your physical base pan is severely rusted or structurally compromised, a repair attempt will likely fail. Shredded vinyl, disintegrating foam, and deformed mounting brackets are clear indicators that the assembly has reached the end of its functional life. In such cases, structural integrity is at risk, and a full swap is the safest decision.
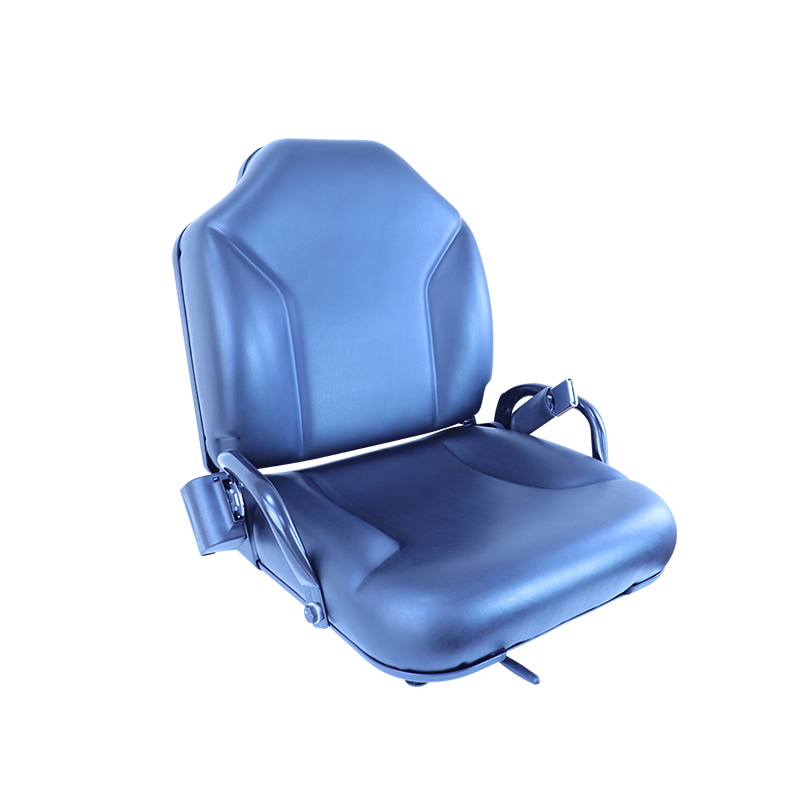
Recent shifts in the turf care industry show a strong trend toward aftermarket modularity. Professionals are increasingly moving away from sourcing obsolete parts in favor of universal, ergonomic alternatives. This transition is driven by the availability of more durable, tear-resistant materials and designs that prioritize spinal health. Replacing an aging assembly with a universal mower seat often provides better long-term value, as these units are built to withstand modern operational demands.
Moving to an aftermarket seat is a popular way to extend the comfort and utility of an aging mower. Your original schematic remains a vital reference tool during this transition, acting as the roadmap for a successful swap.
Aftermarket options are designed with versatile, slotted mounting patterns to accommodate a wide variety of original chassis configurations. By measuring your existing bolt footprint against the dimensions provided in the new product documentation, you ensure a vibration-free fit. This compatibility minimizes the need for adapters and ensures that the seat is correctly positioned for optimal control reach.
Begin the installation by removing the old hardware using the appropriate socket wrench. As you disconnect the safety wiring, be mindful of the harness routing shown in your original schematic. Once the new base is aligned with the mounting holes, fasten it securely, ensuring all bolts are torqued according to manufacturer guidelines. Finally, plug in the operator presence sensor and verify that the system is fully functional before engaging the blades.
For operators of smaller residential zero-turn mowers or compact utility tractors, space is at a premium. A large, heavily bolstered seat might interfere with your ability to operate control arms or maneuver in tight spaces.
A compact seat offers a lower profile and narrower width, providing essential ergonomic support without unnecessary bulk. These designs are ideal for machines where operator movement must remain unrestricted. When installing these units, you may occasionally need steel adapter plates to bridge the gap between the mower's wider chassis mount and the narrower seat base, ensuring a safe and stable connection.
Modern seats often incorporate specific features to combat the harsh environment of outdoor power equipment. One highly beneficial feature is the integrated water drain hole, which prevents rainwater from pooling in the center of the cushion. By allowing moisture to escape, this design prevents the internal foam from becoming waterlogged, effectively stopping mold growth and extending the lifespan of the upholstery.
Before starting your project, gather the right tools. A standard socket set, open-ended wrenches, and a flathead screwdriver are usually sufficient for most replacements. If you are replacing structural hardware, always use grade 5 or grade 8 zinc-plated bolts. Inferior steel can vibrate loose over time, creating a significant safety hazard. A prepared workspace not only saves time but also prevents the frustration of losing small parts during the swap.
A lawn mower seat drawing is an essential resource for diagnosing structural concerns and understanding the safety systems of your machine. While minor repairs can offer a temporary solution, investing in a high-quality replacement is often the most cost-effective and comfortable path forward. Whether you require a standard universal model or a compact design for limited space, upgrading restores the safety and ergonomics of your equipment. Check your schematic today to determine if your machine is due for an upgrade, and select the right component to improve your mowing experience.
Detailed schematics are typically included in your original owner’s manual. If the manual is unavailable, you can check the manufacturer’s website or search your mower’s specific model number on authorized parts distributor sites to access the digital exploded diagrams.
Most universal seats are engineered with slotted mounting holes to fit various standard bolt patterns. However, you should always measure your current mounting layout and compare it against the specifications of the new seat to ensure a safe, vibration-free fit before completing your purchase.
Gluing is a viable temporary fix for minor surface tears. If the internal foam is degrading or the metal base is bent and rusted, a full replacement is recommended. A new seat offers better durability, improved comfort, and long-term protection against the elements.
A compact design is tailored for smaller zero-turn mowers where operator space is limited. It provides necessary ergonomic support without adding bulk, which allows for greater visibility and easier access to control levers or lap bars.
The hole is a purposefully designed water drain. It allows dew and rainwater to escape from the cushion, preventing the internal foam from rotting, molding, or freezing, which significantly increases the overall durability of the seat.