Views: 0 Author: Site Editor Publish Time: 2026-11-21 Origin: Site
Is your ride feeling a bit rough lately? A cracked or worn-out cushion makes every mowing session a chore. You finish the lawn feeling stiff and fatigued. Many operators wonder if they can simply swap in a new replacement while keeping their original springs. This guide clears up the confusion surrounding compatibility and mounting hardware. You will learn how to verify your chassis mechanics, assess structural integrity, and decide if an ergonomic upgrade is the right path forward.
A universal design is engineered to accommodate the vast majority of residential and commercial mowers on the market. Manufacturers achieve this versatility by utilizing standardized mounting patterns rather than brand-specific latches. Most models come with pre-drilled slotted holes commonly configured in patterns like 8" x 11.5" or 11.25" x 11". These slots allow for lateral and longitudinal adjustments. This crucial feature ensures the universal lawn mower seat aligns correctly with the mounting platform of your specific machine.
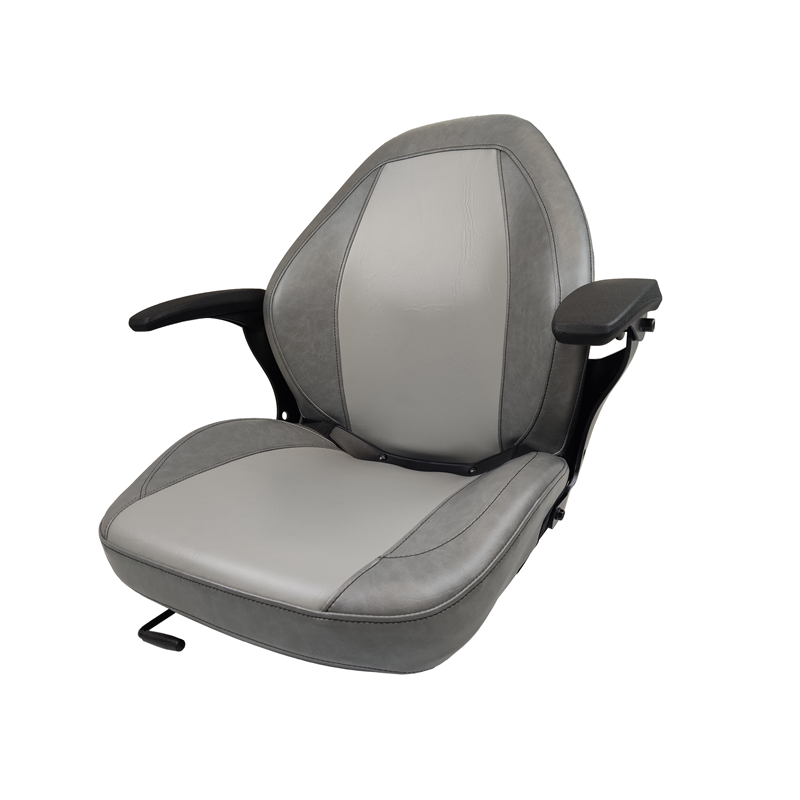
Beyond the bolt pattern, premium aftermarket seats are designed with a reinforced steel base plate. This heavy-gauge plate provides the structural integrity necessary to support the operator's weight while allowing for the attachment of sliders or original equipment hardware. While basic bucket seats offer a simple replacement, advanced options now feature vacuum-formed heavy-duty PVC vinyl and high-resilience polyurethane sponge. Some models even incorporate adjustable armrests and backrest angles up to 110 degrees to tailor the support profile. Understanding these base dimensions and structural features is the first step in ensuring your new equipment fits securely without requiring complex modifications.
The question of whether to retain your factory springs is a common dilemma for equipment owners. In many instances, the answer is a cautious yes, provided the mechanical interface remains compatible. If your mower features a dedicated bolt-on plate where the factory springs attach, and that plate aligns perfectly with the threaded inserts on your new cushion, you may be able to reuse them seamlessly.
However, several technical constraints can complicate this process. When wrenching under the chassis, keeping track of exact clearances is vital for safe operation.
Compatibility Factor | Engineering Consideration |
|---|---|
Mounting Width | Factory spring bases are often too wide or narrow for universal seat brackets, requiring custom steel fabrication. |
Hardware Length | Reusing springs frequently requires longer high-grade bolts to clear the frame securely and prevent shear failure. |
Spring Bounce | Integrated seat suspensions may clash with older coil springs, causing excessive and dangerous rebound forces. |
Structural Integrity | Rusted, pitted, or fatigued factory springs should be discarded immediately rather than reinstalled. |
If your new hardware features an integrated heavy-duty suspension system, factory springs become entirely redundant. In these specific cases, maintaining the original springs can actually interfere with the damping performance of the new shock absorbers. This conflict leads to an unstable and jarring ride. Transitioning to a dedicated system is safer and far more effective if your old springs have lost their tension or structural rigidity.
Before purchasing any replacement, you must thoroughly inspect the mounting platform currently installed on your mower. Picture the metal structure directly beneath the cushion. This deck is often integrated with safety interlocks or spring mounts. Categorize your mower’s mounting style as either top-mount or bottom-mount. Top-mount systems generally attach the seat directly to a sliding bracket. Bottom-mount systems rely on fixed pivot points bolted directly to the mower frame.
Check the condition of the metal platform for signs of galvanic corrosion. Rust can severely weaken the mounting points. This creates a significant safety risk when the mower vibrates at high RPMs during operation. If the platform shows signs of deep pitting or structural failure, reusing existing hardware is highly discouraged. Invest in a new bracket that ensures the seat remains locked in place. Furthermore, always use a high-quality thread-locking fluid on your bolts during installation. This simple step prevents the constant high-frequency vibration of the engine from loosening the hardware over time.
When replacing any seating component on outdoor power equipment, maintaining the integrity of the safety interlock systems is a non-negotiable requirement. The Operator Presence Control switch is a critical safety device located beneath or within the seat cushion. Its primary function is to detect the weight of the operator. If you leave the seat while the mower blades are engaged or the parking brake is disengaged, this switch interrupts the ignition circuit. The engine shuts down immediately to prevent catastrophic accidents.
Transferring this switch correctly is a common challenge when installing aftermarket seating. Most factory seats use a plunger-style or pressure-pad switch. Identify whether your mower utilizes a normally open or normally closed electrical circuit before beginning your installation.
Carefully disconnect the wiring harness when you remove the original seat. Do not cut the wires. The factory connector must plug directly into the new switch mechanism. Many aftermarket seats are manufactured with a standardized pre-cut cavity designed to accept standard twist-and-lock safety switches. If the cavity dimensions differ, you will need an OEM-compatible adapter harness to bridge the gap.
Under no circumstances should the safety switch be bypassed, hardwired, or mechanically defeated. Bypassing this mechanism creates a severe physical hazard and carries significant liability implications. In commercial landscaping applications, disabling safety interlocks violates Occupational Safety and Health Administration regulations. This action will immediately void both the equipment manufacturer’s warranty and your commercial liability insurance coverage. Verify that the switch engages and disengages with an audible click, and test the engine shut-off function in a controlled environment before returning the mower to active service.
Looking at broader landscaping industry trends, there is a prominent shift toward operator wellness and vibration isolation technologies. Commercial fleet managers and residential operators alike are recognizing the long-term physical toll of legacy equipment. As awareness of chronic back pain associated with prolonged equipment operation grows, the market is rapidly moving away from rudimentary coil spring setups.
Modern engineering now favors advanced ergonomic damping systems designed to mitigate whole-body vibration. This transition reflects a deeper understanding of occupational health. Minimizing spinal compression directly translates to increased daily productivity, fewer lost workdays, and better overall focus while navigating challenging terrain.
For many DIY mechanics, the initial goal is simply replacing a torn cushion. Assessing the limitations of basic factory spring systems often leads to a more comprehensive ergonomic evaluation. Standard factory springs operate on basic principles of physics. They absorb downward kinetic energy and immediately release it upward. This creates an uncontrolled rebound effect. When operating on uneven terrain, this rebound amplifies whole-body vibration, which clinical studies link to premature lumbar spine fatigue and muscle strain.
If you operate your machine for more than an hour per session, upgrading to a dedicated lawn mower suspension seat provides a measurable mechanical advantage over legacy spring setups. A true suspension system utilizes a combination of heavy-duty scissor mechanisms and hydraulic or pneumatic shock absorbers. Premium models feature variable tension dials that adjust to operator weights ranging from 110 to 286 lbs, alongside suspension strokes of up to 3 inches. The shock absorber acts as a damper, dissipating the kinetic energy as heat rather than returning it to your spine. This effectively isolates the driver from chassis impacts.
Feature | Factory Spring Systems | Integrated Suspension Seats |
|---|---|---|
Energy Management | Absorbs and reflects energy causing rebound | Dampens and dissipates energy providing isolation |
Vibration Reduction | Low to Moderate | High meeting commercial whole-body vibration standards |
Terrain Suitability | Flat well-graded residential lawns | Rough uneven or agricultural terrain |
Weight Adjustment | Fixed tension rarely adjustable | Variable tension dials for specific operator weights |
Installation Complexity | Simple bolt-on replacement | May require clearance checks and steel adapter plates |
Proper installation ensures both the structural integrity of the mounting platform and the reliable operation of safety switches. A meticulous approach to replacing your seating hardware prevents vibration-induced failures down the road.
Safe Removal and Disconnection
Begin by parking the mower on a level surface, engaging the parking brake, and removing the ignition key. Disconnect the negative terminal of the battery to prevent accidental short circuits. Tilt the old seat forward to access the wiring harness and carefully unplug the safety switch. Using a socket wrench, remove the pivot bolts or slider bracket nuts securing the seat to the chassis. Keep the original hardware organized in a magnetic tray.
Cleaning and Inspecting the Mounting Platform
Inspect the steel mounting deck once the old cushion is removed. Years of exposure to moisture and acidic grass clippings often cause galvanic corrosion. Use a stiff wire brush to remove surface rust. Apply a rust-inhibiting primer if bare metal is exposed. Check the mounting plate for stress fractures or metal fatigue, particularly around the bolt holes. A compromised base plate will fail under the dynamic load of a new seat and must be welded or replaced.
Measuring and Aligning
Invert your new replacement on a non-abrasive surface and measure the threaded insert pattern. Compare this directly to your mower’s mounting deck. Proceed with direct mounting if the patterns align perfectly. If there is a discrepancy, do not attempt to force bolts at a severe angle. This will strip the threads. Utilize a heavy-gauge steel adapter plate instead. Secure the adapter plate to the mower chassis first, then mount the seat to the adapter.
Re-installing the Safety Switch and Final Torque Checks
Insert the safety switch into the new seat pan, ensuring the locking tabs engage fully. Reconnect the wiring harness and secure any loose cables with zip ties. This prevents wires from rubbing against moving suspension parts. Apply a medium-strength thread-locking fluid like blue Loctite to all mounting bolts.
Bolt Diameter / Thread Pitch | Recommended Torque ft-lbs | Recommended Torque Nm |
|---|---|---|
5/16" - 18 | 12 - 15 ft-lbs | 16 - 20 Nm |
3/8" - 16 | 20 - 25 ft-lbs | 27 - 34 Nm |
M8 x 1.25 | 14 - 17 ft-lbs | 19 - 23 Nm |
M10 x 1.5 | 28 - 33 ft-lbs | 38 - 45 Nm |
A proactive maintenance schedule is essential to maximize the lifespan of your investment. The materials used in modern seating, typically high-density polyurethane foam and heavy-duty vinyl upholstery, are highly durable but remain susceptible to environmental degradation if neglected.
Moisture combined with ultraviolet radiation is the primary enemy of any outdoor seating. Ultraviolet rays extract the plasticizers from vinyl over time, causing the material to become brittle and eventually crack. Once the vinyl is breached, rainwater infiltrates the polyurethane foam. The foam acts like a sponge, retaining moisture against the steel base pan. This accelerates internal rust that you cannot see until structural failure occurs. Store your mower indoors or utilize a waterproof, breathable equipment cover to prevent this degradation.
Avoid using high-pressure washers when cleaning your lawn mower seat. Intense water pressure forces moisture past the stitched seams and into the electrical connections of the safety switch. Use a soft-bristle brush and a mild pH-neutral detergent to remove dirt and acidic grass clippings. Wipe the surface dry with a microfiber cloth. Applying a marine-grade vinyl protectant every three months restores ultraviolet resistance and keeps the material supple.
Mechanically, the mounting hardware requires periodic attention. Constant engine vibration can cause even thread-locked bolts to back out slightly over time. Re-torque all mounting and suspension bolts after the first 10 hours of initial use. Following this break-in period, incorporate a hardware torque check and a visual inspection of the wiring harness into your annual pre-season routine. For suspension models, keep the slider tracks free of debris. Apply a dry polytetrafluoroethylene spray lubricant to ensure smooth fore-and-aft adjustment without attracting abrasive dust.
Reusing factory springs is mechanically possible for many mowers, though it is rarely the optimal choice for operators tackling rough terrain or extended mowing sessions. Ensuring that all safety switches remain fully functional is paramount to protecting the operator throughout any installation. Always take the time to measure your bolt patterns accurately before upgrading parts to avoid frustrating structural modifications. Prioritizing better seating dramatically improves your daily comfort and long-term ergonomic health. If you are ready to transform a grueling chore into a smooth ride, explore the extensive catalog of premium replacements at Everwin Seats to find the exact ergonomic upgrade engineered for your specific chassis.
Most universal seats are engineered with a multi-hole mounting block or adjustable slider tracks designed to accommodate standard industry bolt patterns like 11.25" x 11" or 8" x 11.5". However, universal does not mean identical. You must measure the precise distance between the mounting holes on your current mower deck and compare them against the technical specifications of the replacement seat before purchasing.
You should never drill directly into the structural base pan of the new seat if the patterns do not align. Doing so voids the warranty and compromises its load-bearing integrity. Purchase or fabricate a steel adapter plate instead. You can safely drill custom holes into the adapter plate to bridge the dimensional gap between your mower's factory deck and the new seat's threaded inserts.
No, not all aftermarket seats feature a pre-cut cavity for an Operator Presence Control switch. Basic bucket seats often omit this feature. Premium replacements typically include a standard twist-lock hole, but you must verify this in the product description. If a seat lacks an internal switch cavity, you may need to utilize an external weight-activated switch or select a different model to ensure your safety circuit remains operational.
A suspension seat is a highly justified investment if your mowing sessions exceed one hour, or if you operate a zero-turn mower on uneven rutted terrain. The integrated shock absorbers drastically reduce whole-body vibration, minimizing spinal compression and lower back pain. This reduction in operator fatigue translates directly to better focus, higher mowing speeds, and superior long-term ergonomic health.
Standard oil-based penetrating fluids are not recommended for exposed seat tracks or suspension springs. Oil-based lubricants act as magnets for dust, dirt, and abrasive grass clippings. This debris eventually grinds into the slider bearings and causes premature wear. Petroleum distillates can also degrade the rubber boots protecting electrical switches. Use a dry silicone spray or a dry polytetrafluoroethylene based lubricant instead.
A failing Operator Presence Control switch often presents as intermittent engine stalling, especially when traversing bumpy terrain. If your mower engine cuts out briefly when you shift your weight, or refuses to crank despite a fully charged battery and engaged parking brake, the internal contacts of the switch are likely worn or corroded. Testing the circuit with a digital multimeter for continuity will confirm if a replacement is necessary.
Adding armrests depends entirely on the internal frame structure of your current seat. Many premium aftermarket options feature pre-drilled and tapped steel plates hidden beneath the vinyl specifically for armrest mounting. Basic bucket seats lack this structural reinforcement. Attempting to bolt armrests directly through the plastic or thin steel pan will result in immediate tear-out under load. It is usually more cost-effective to purchase a seat with factory-integrated armrests.